Clip Studio Paint How to Draw Fire
Index
- Introduction
- Drafts
- Inking
- Color
- Blur
- Integrate your explosion
1. Introduction
Welcome to my new tutorial. This time, I will give you the keys to developing an analogy of an explosion pace by step to increase your artwork'south dynamism and realism.
Please do as well read up on films, comics, books, and photographs. Analyze the shapes of the smoke, fire, and objects being affected. I too encourage you to make your own version of my explosions and share them with the rest of us artists in the Prune Studio Paint community.
2. Drafts
First, open Clip Studio Paint (CSP from now on) and create a new file. In my example, I have opened a portrait, A4 size file.
File > New > A4 vertical > OK
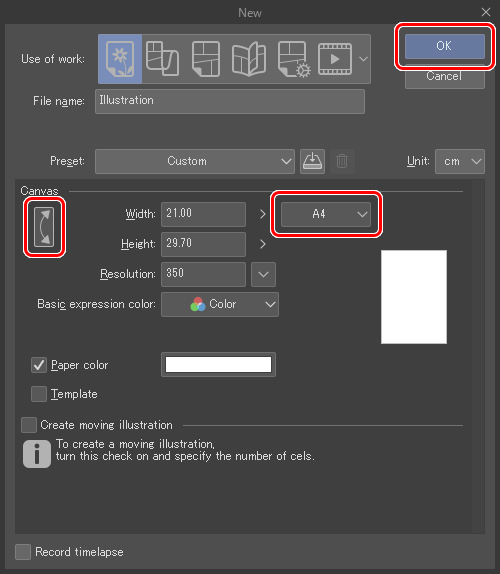
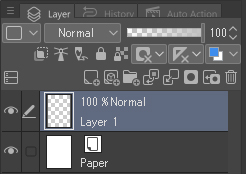
One time you are in forepart of a blank canvas, go to the layers palette and place your mouse in the empty layer just above the groundwork layer (paper). This layer is ordinarily nowadays by default in CSP; yous shouldn't need to create it.
Let's begin!
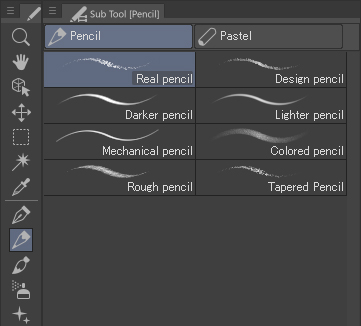
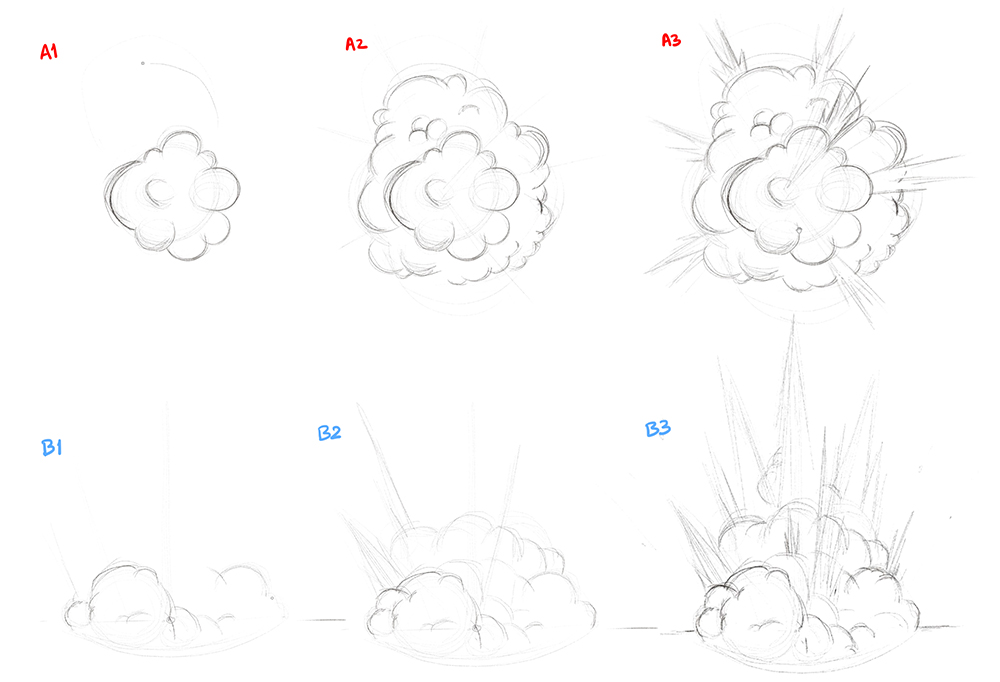
The get-go pace is to gently sketch the shape of the explosion with simple curves and lines. I use thePencil >Real pencil tool. Pay attention to your mood or reference board to give the explosion a credible shape. I volition brand two unlike shapes, an aeriform explosion (A) and some other happening on the ground (B). These should give y'all enough variety to commencement with in your drawings.
3. Inking
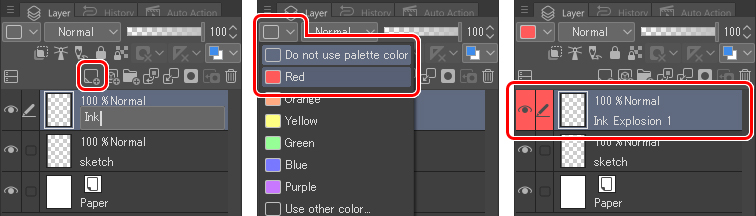
Once this brief sketch is washed, I create a new layer on acme of the Draft layer, rename information technology Ink Explosion ane, and requite it a carmine colour to quickly locate it in later steps. On this layer, I ink and create the volume for the fire and fume.
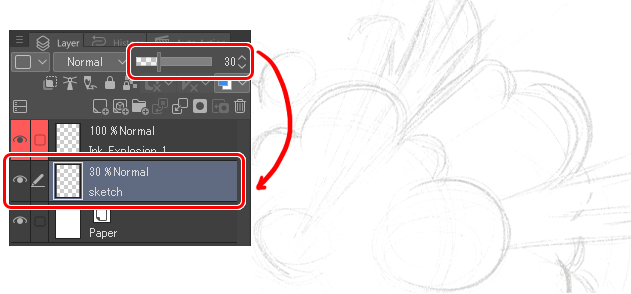
If the sketch lines are too bold or distracting, lower the layer'southward opacity.
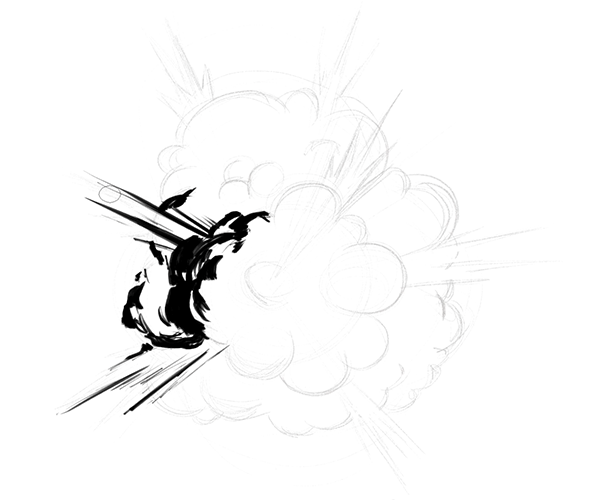
In the new layer, I use a medium-sized pen, the Rough pen, in black to start drawing the volume of the explosion.

▼Animated GIF
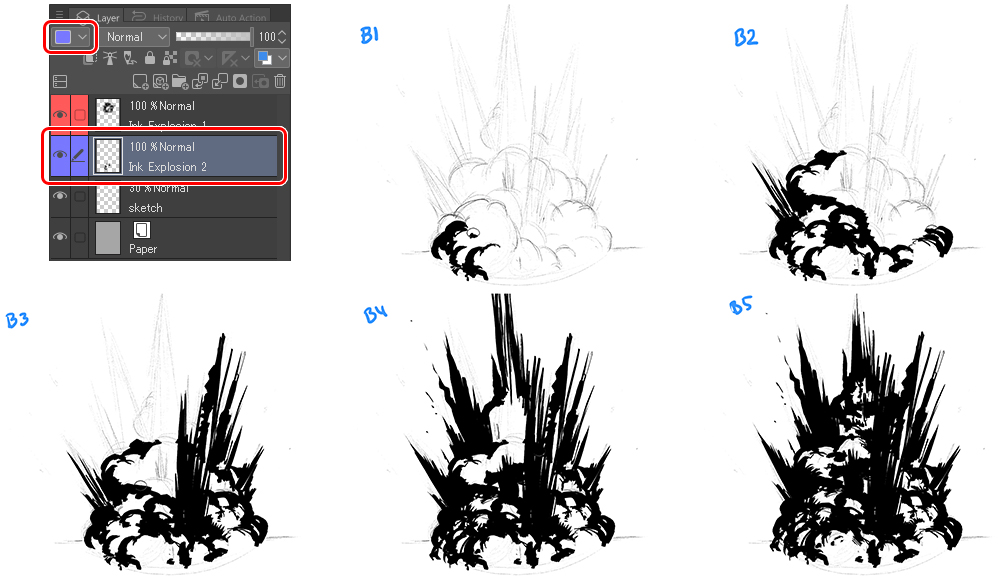
I follow the same process for the second explosion. I create a new layer, name itInk Explosion 2 and change it to blueish colour.
Check out the post-obit image:
Past clicking on the thumbnail, I take changed the sheet background colour to gray. This allows me to add white in the next pace:
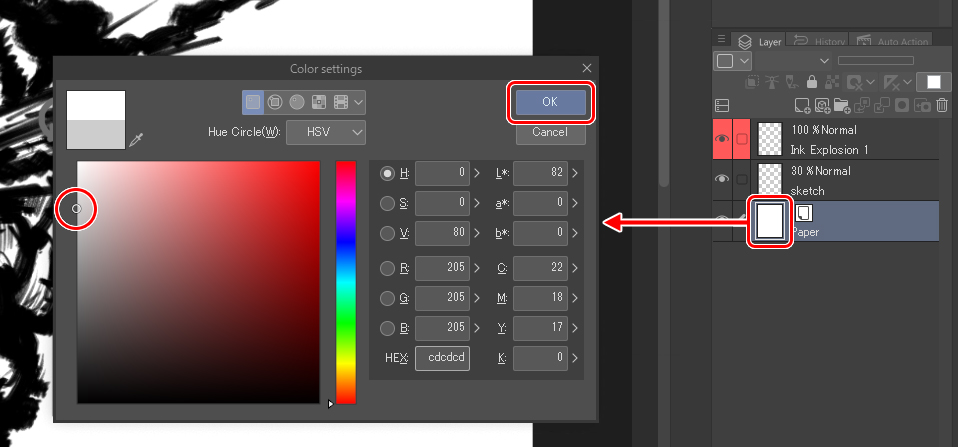
In a new layer placed nether the ink layer, I use white to create a flat base. This way, my explosion is a solid object without any loose holes. I proper name this layerWhite Base.
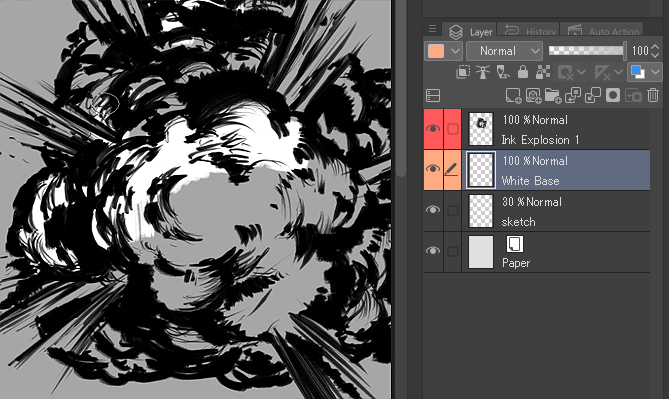
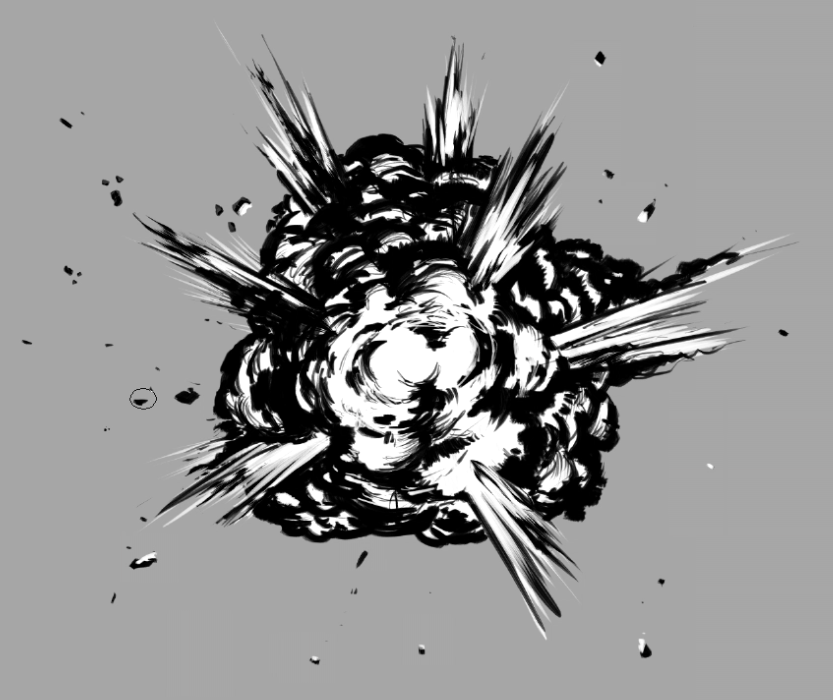
To finish off inking this explosion, I merge the Ink Explosion one andWhite base layers. Selecting both layers, I right-click and chooseMerge selected layers in the pop-upwards menu. In the resulting layer, I will brush up on the blackness and white details to finish building upwardly the explosion's volume.
Observe that the flare-ups and the center are whiter than the rest. At present that the blackness and white layers work together, we have a solid, gap-free image, exactly what we need for the next step.
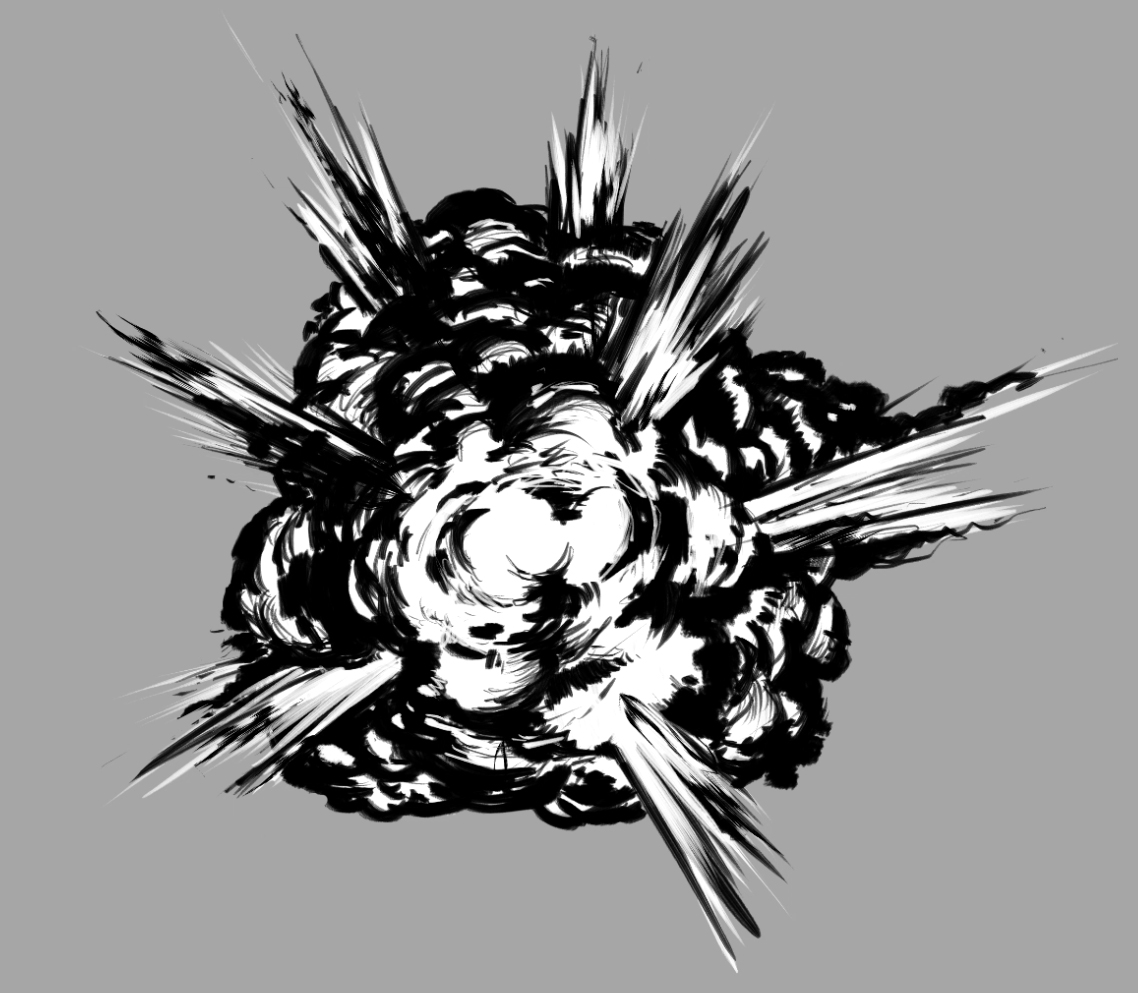
Don't forget to echo these steps on the other explosion!
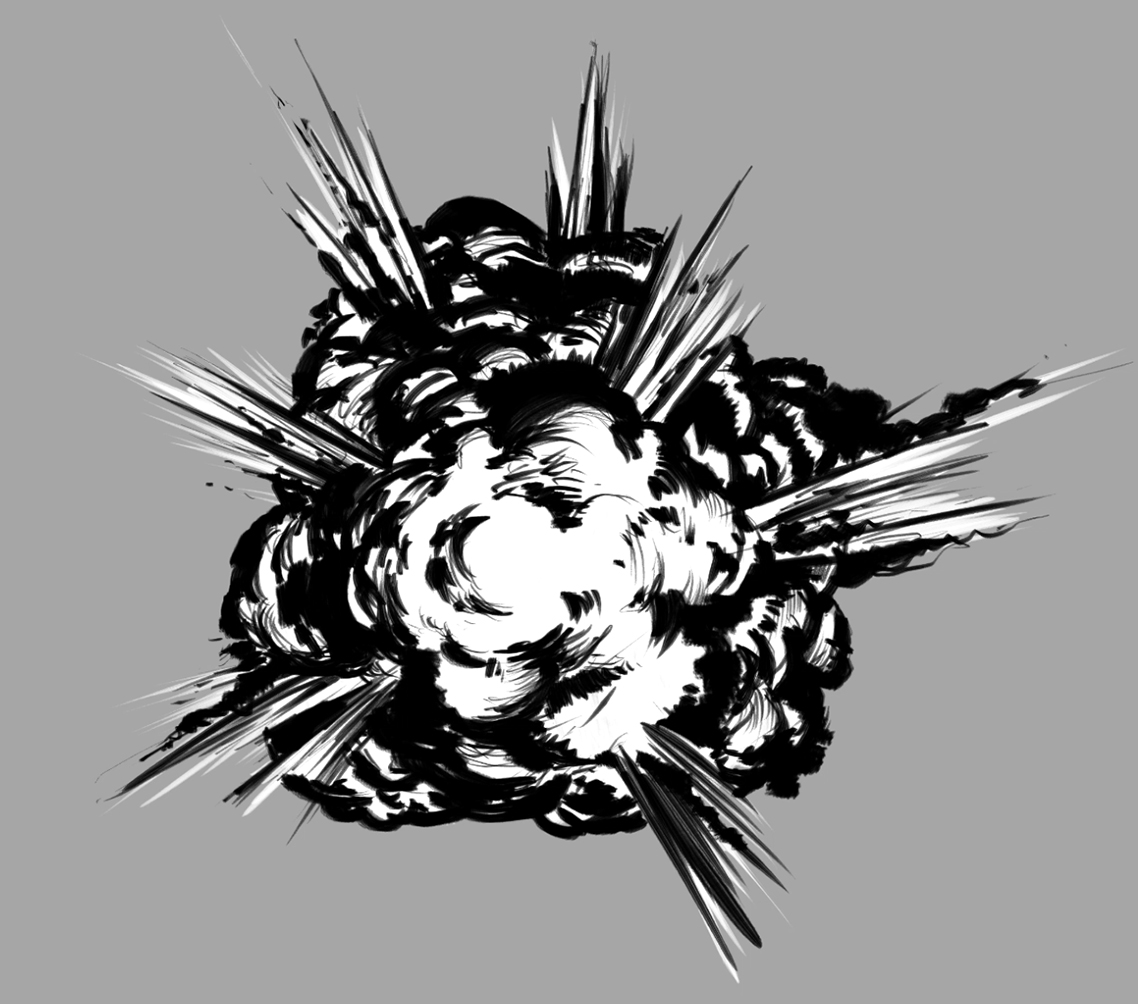
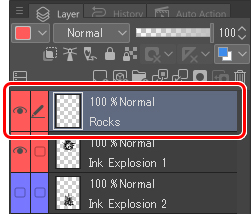
This is the upshot:
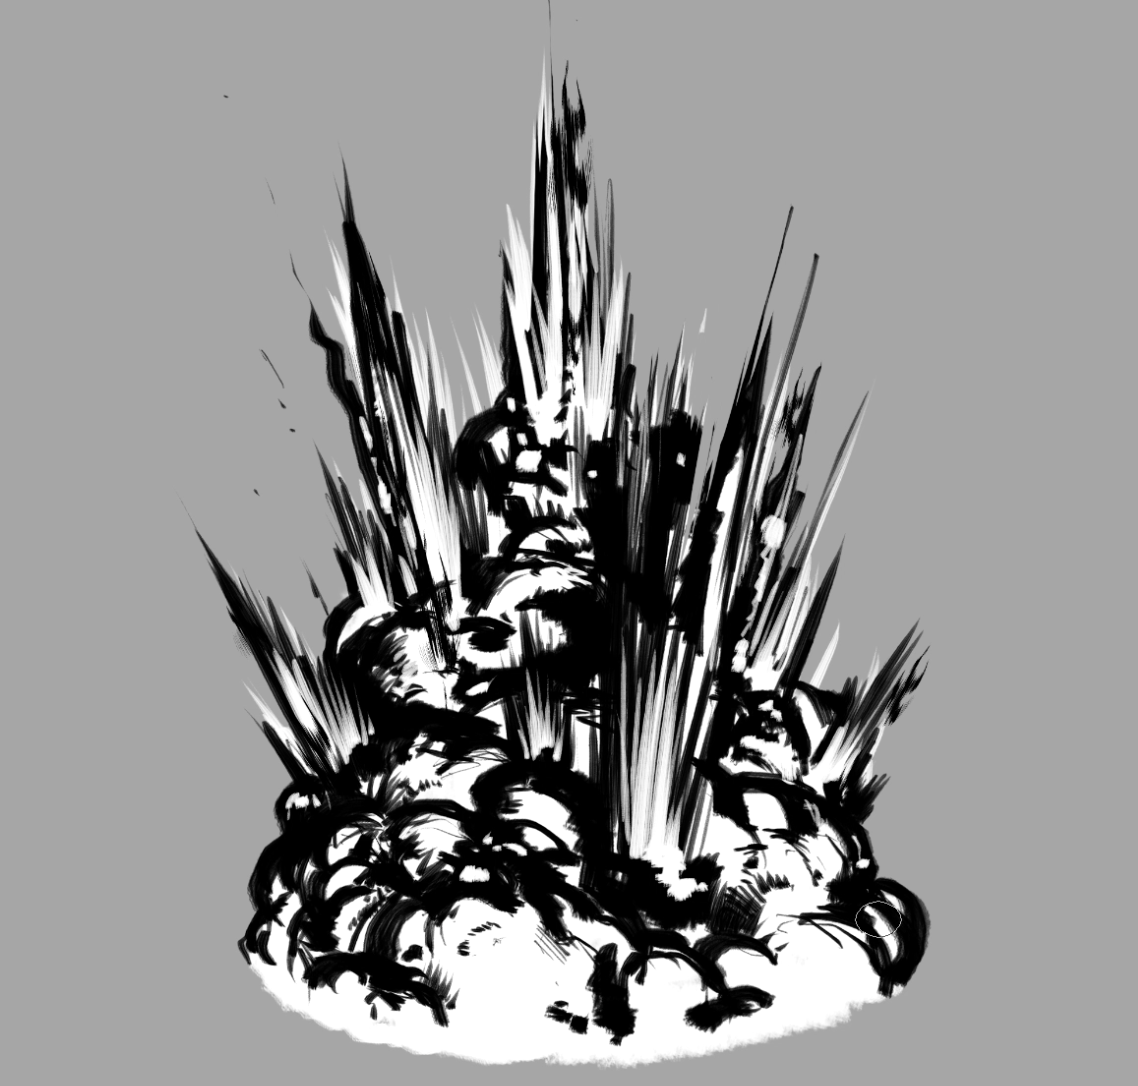
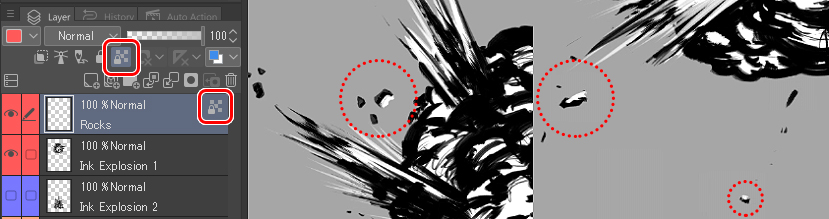
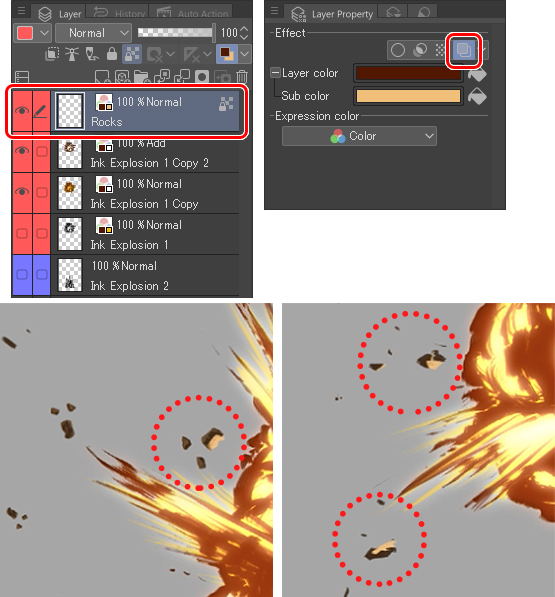
Before moving on to Step 4, I volition add some debris to add together strength to and simulate a real explosion. Y'all can do this step directly on the current layer or create a new one but for the droppings. My advice is the second option. Create a new layer, rename information technology, and requite it a new color. Then depict rocks of unlike sizes around the fire.
Check out this image:
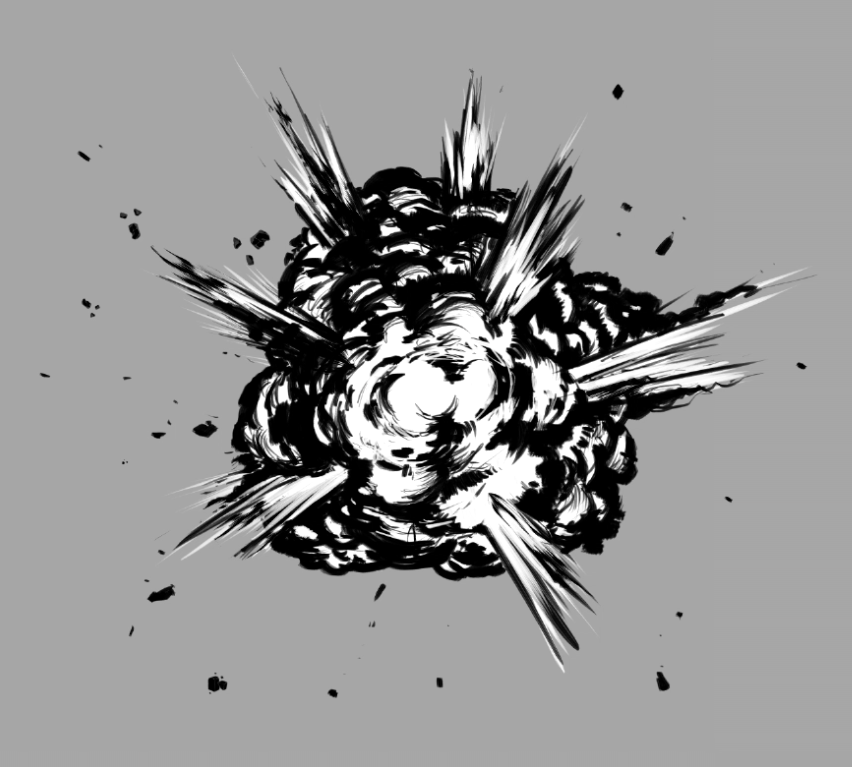
Finally, I add highlights to the debris. To do that, I lock the transparent pixels past clicking the following button (meet image below). This allows you to add together highlights without surpassing the shapes that are already drawn on the layer. Keep in listen that the light source is the explosion itself, so create the highlights on the side facing the fire.
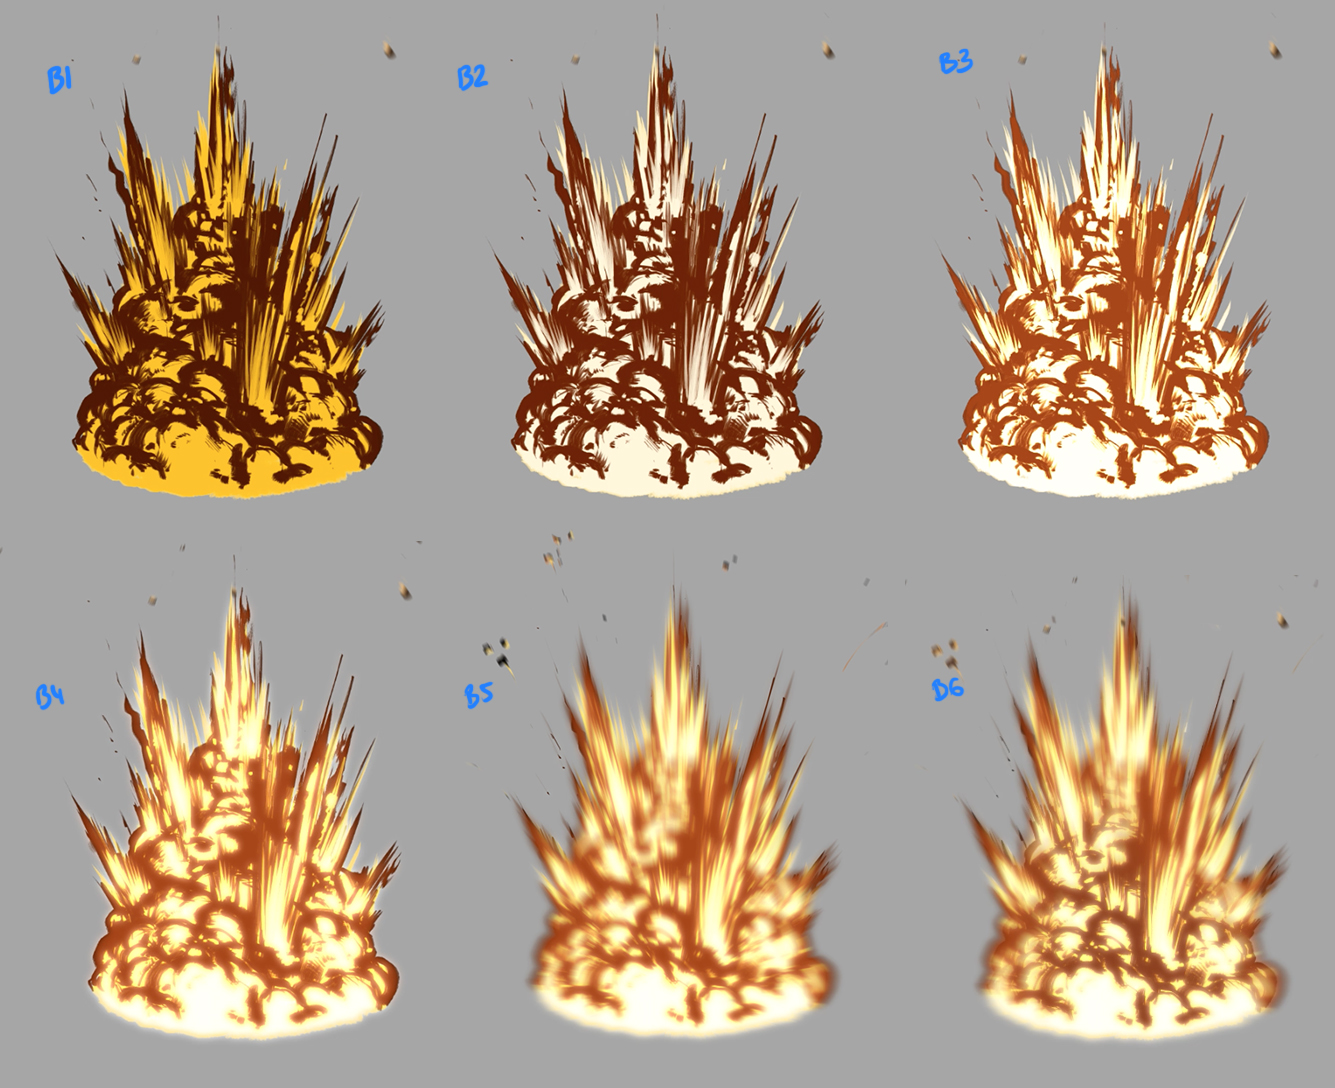
iv. Color
To utilise the color, starting time press theLayer color push in the layer properties palette (information technology is located on the correct past default). In this instance, I fix a nighttime brown (#511900) as the main color and a yellow (#FFC21C) equally the sub colour.
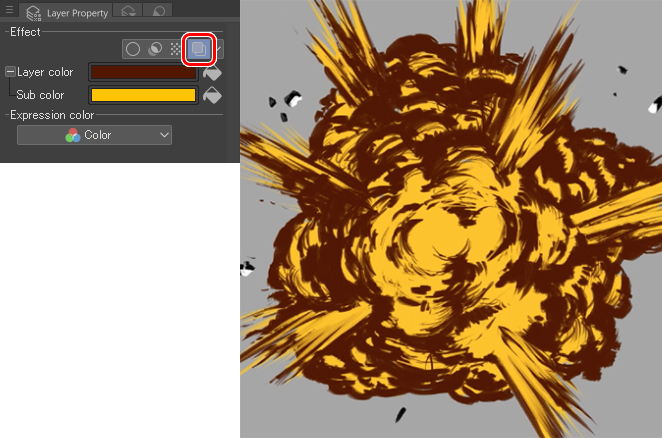
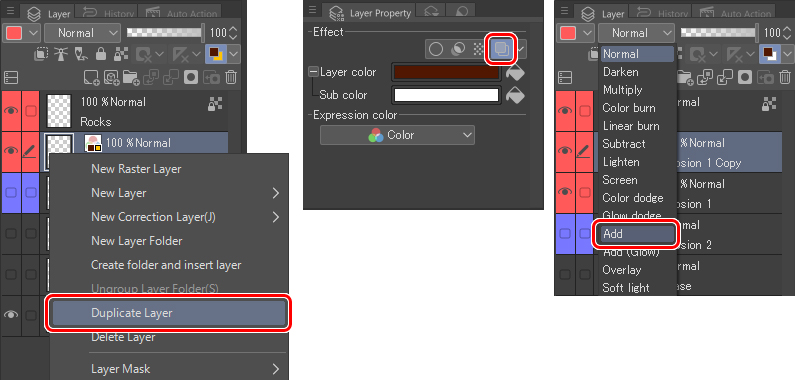
Adjacent, I duplicate the layer (Right-click > Duplicate layer) and employ the following colors: #481C08 (main) and #FFF5DA (sub). Finally, I set the layer blending mode toAdd.
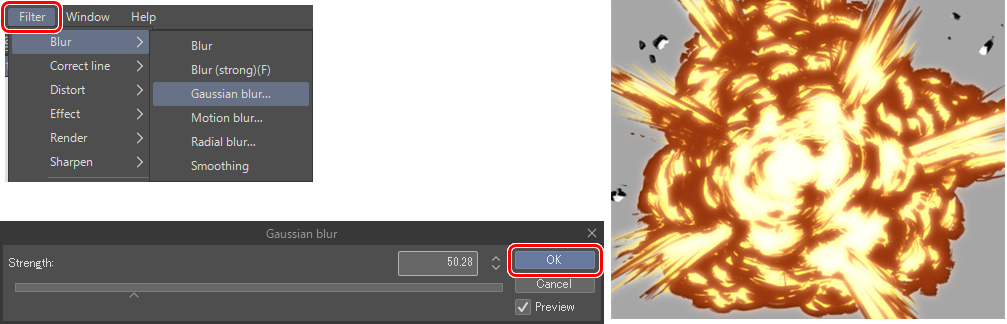
five. Blur
In this pace, I volition utilize Gaussian mistiness and on the terminal layer that I created at approximately 50px for strength.
Filter menu > Blur > Gaussian blur
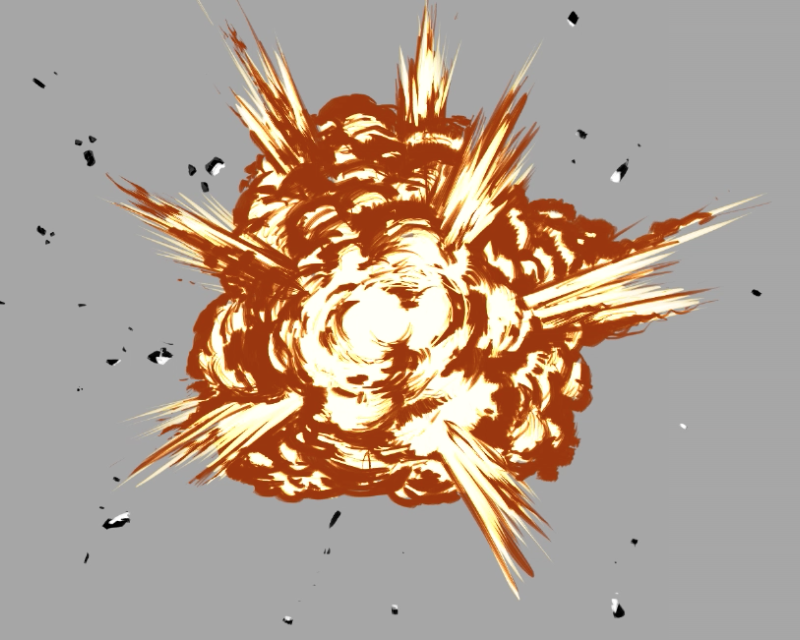
One time color has been added to the debris (using the same colors as the explosion in Step 4), I add a 2d mistiness, and and so in Layer properties, I set the main and sub colors to #412B1A and #EEBD7A, respectively.
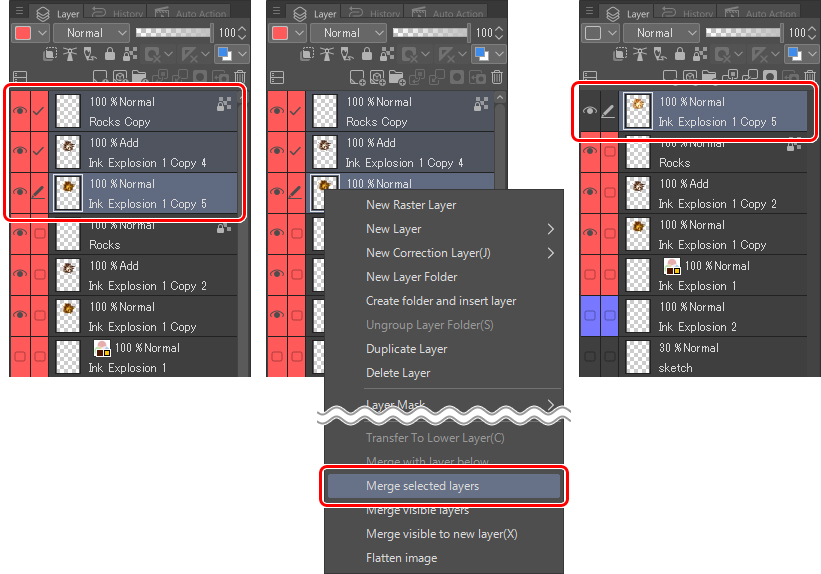
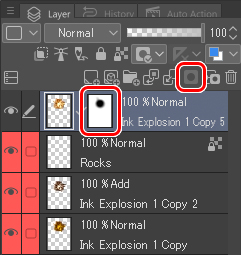
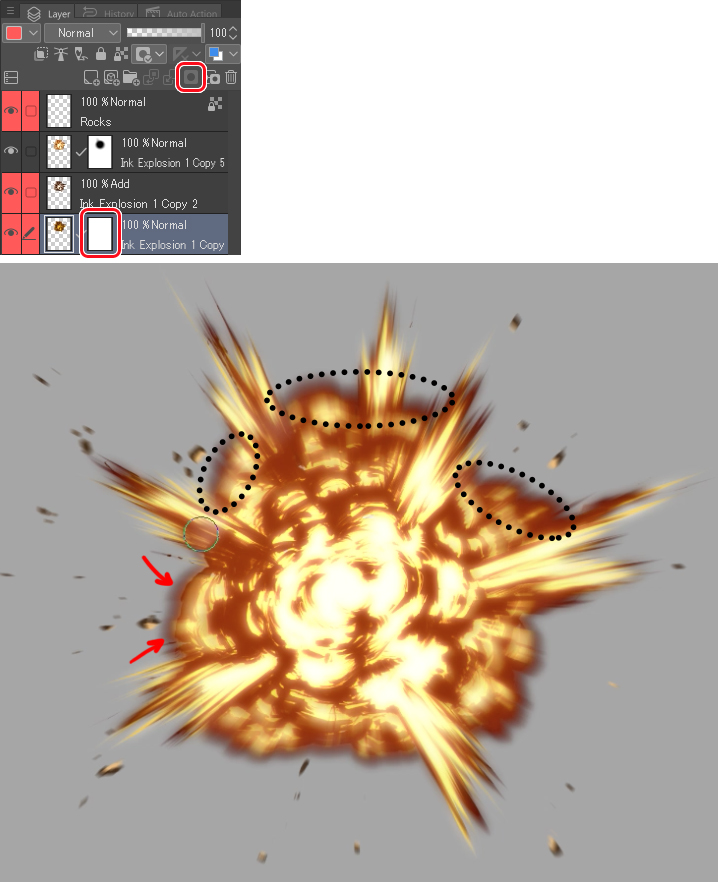
To get the following effect, y'all demand the layers combined into ane, but since you lot want to go along the original layers, information technology is better to duplicate them kickoff and and so merge them. I will alloy the three layers that I take from Explosion 1. To do this, select the three layers with the Cmd/Ctrl and selectIndistinguishable Layer. Once duplicated, merge them into a unmarried layer.
Now is when I utilize the new mistiness. This time I am usingRadial blur. I set up a distance of approximately 5px in an outward direction. Keep in mind that the red cantankerous that appears on the canvas must exist located at the center of the explosion. Click on it and drag it to the desired position.
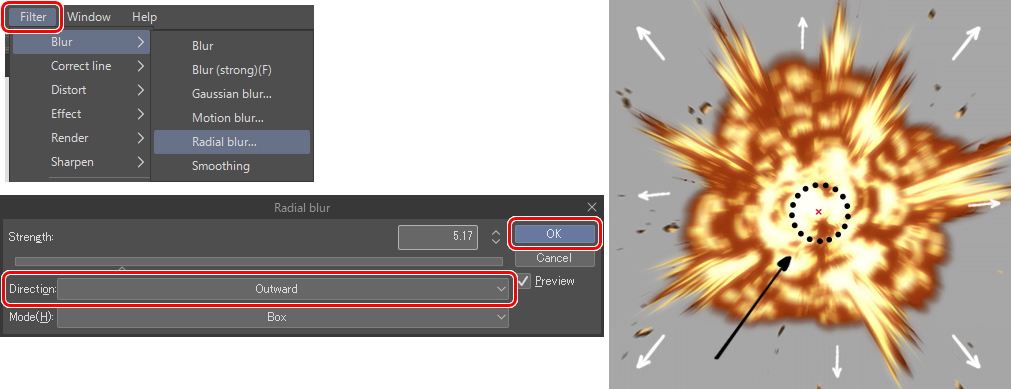
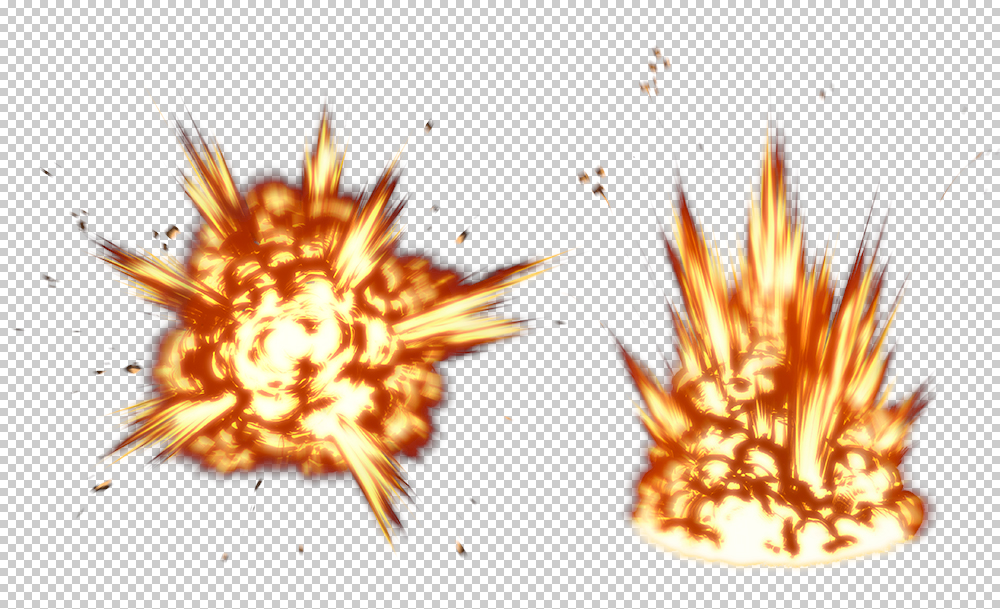
Next, I create a layer mask, where I apply the Eraser to erase part of the blur I just created.
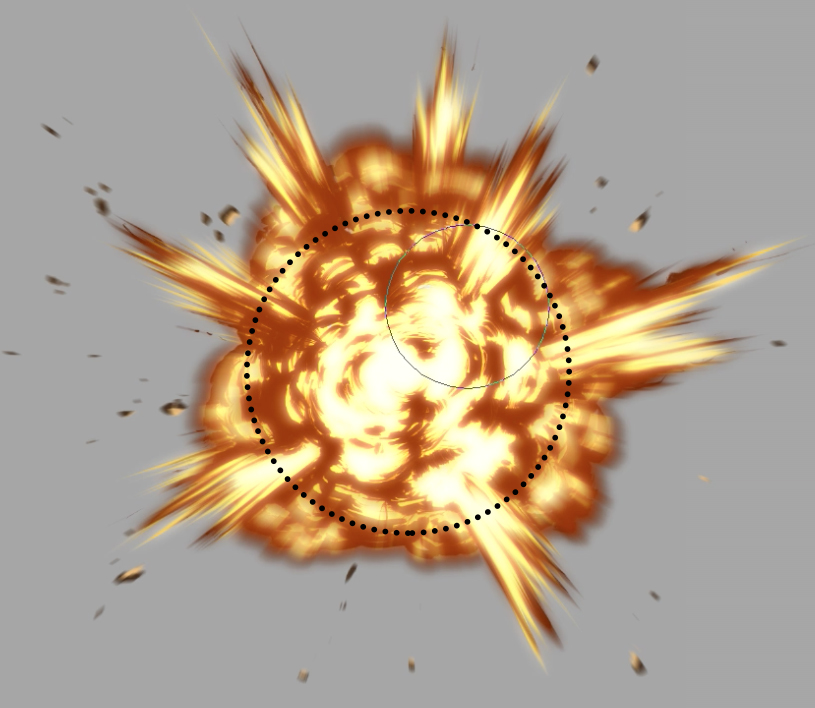
Then I create yet another layer mask, but this time on the first layer, to erase the difficult edges that remain in the background.
Have a look at the following picture:
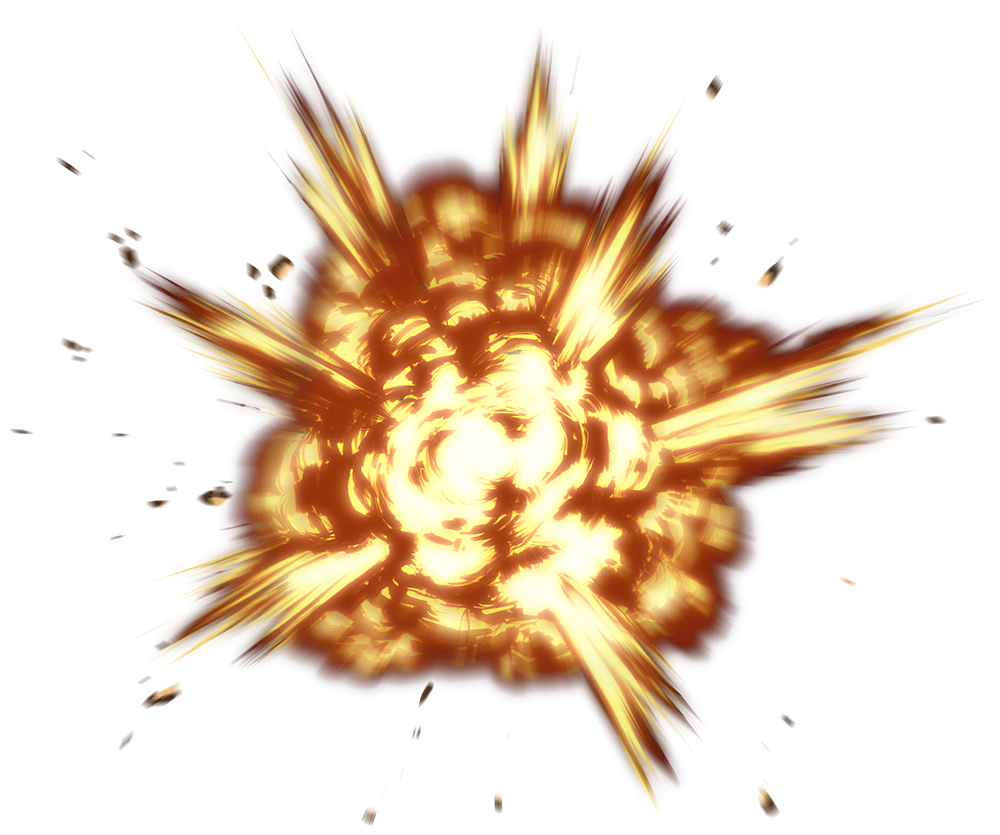
Proceed to pace iv (color) and 5 (mistiness), with the second explosion.

6. Integrate your Explosion
The objective of this tutorial is to be able to make an explosion; however, let me show you some tips to incorporate these explosions in your illustrations. In this case, I will do a quick assembly with CSP tools (Materials) without going into too much detail.
First, save your explosions as PNG, a format like to the well-known JPG, but with the characteristic that saves images with transparency.
Note:Earlier saving an illustration with transparent areas as a PNG, think to outset hide the newspaper layer (Paper).
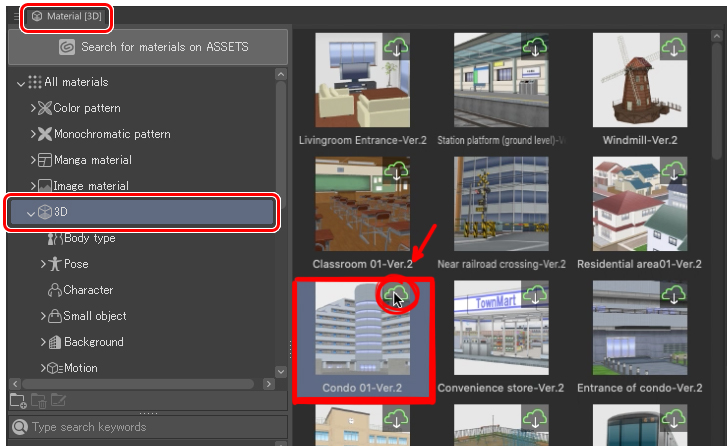
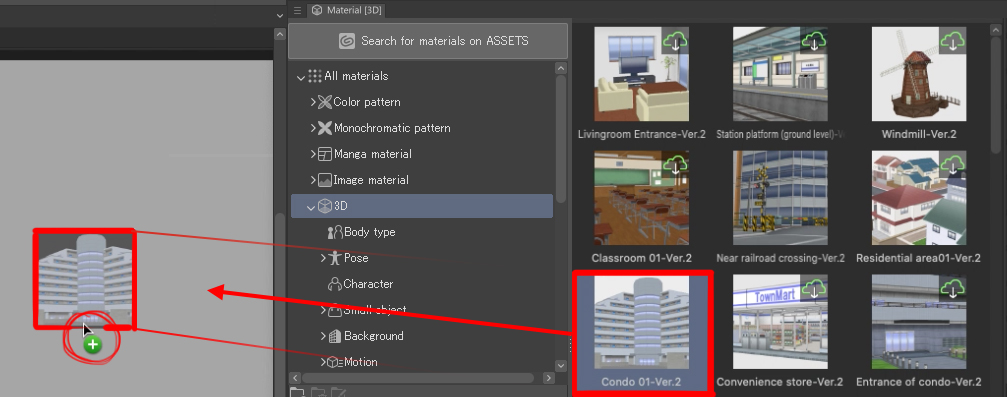
Side by side, in a new file, open the 3D folder in the CSP free library.
To practice this, go to the Material (3D) palette and search through Prune Studios materials, select a scene that yous like and click on it to download information technology for free.
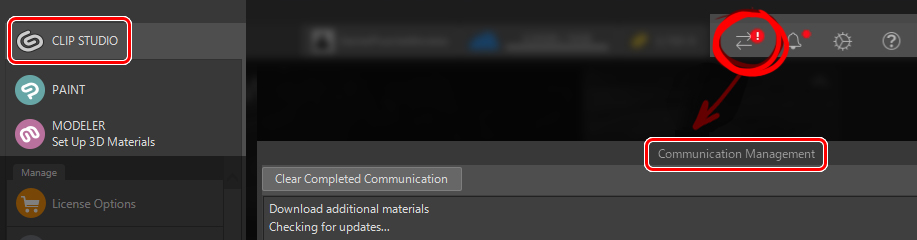
The Prune Studio window will automatically open. One time you are logged in (in case yous were not), a notification will appear under theCommunication Managementscreen, and you lot will see that your 3D material has successfully been downloaded.
Dorsum in CSP, you just have to drag the material to the canvas to piece of work with information technology.
Place the environment in a perspective that you like and import (Edit > Import) the PNG of the explosion that you saved previously.
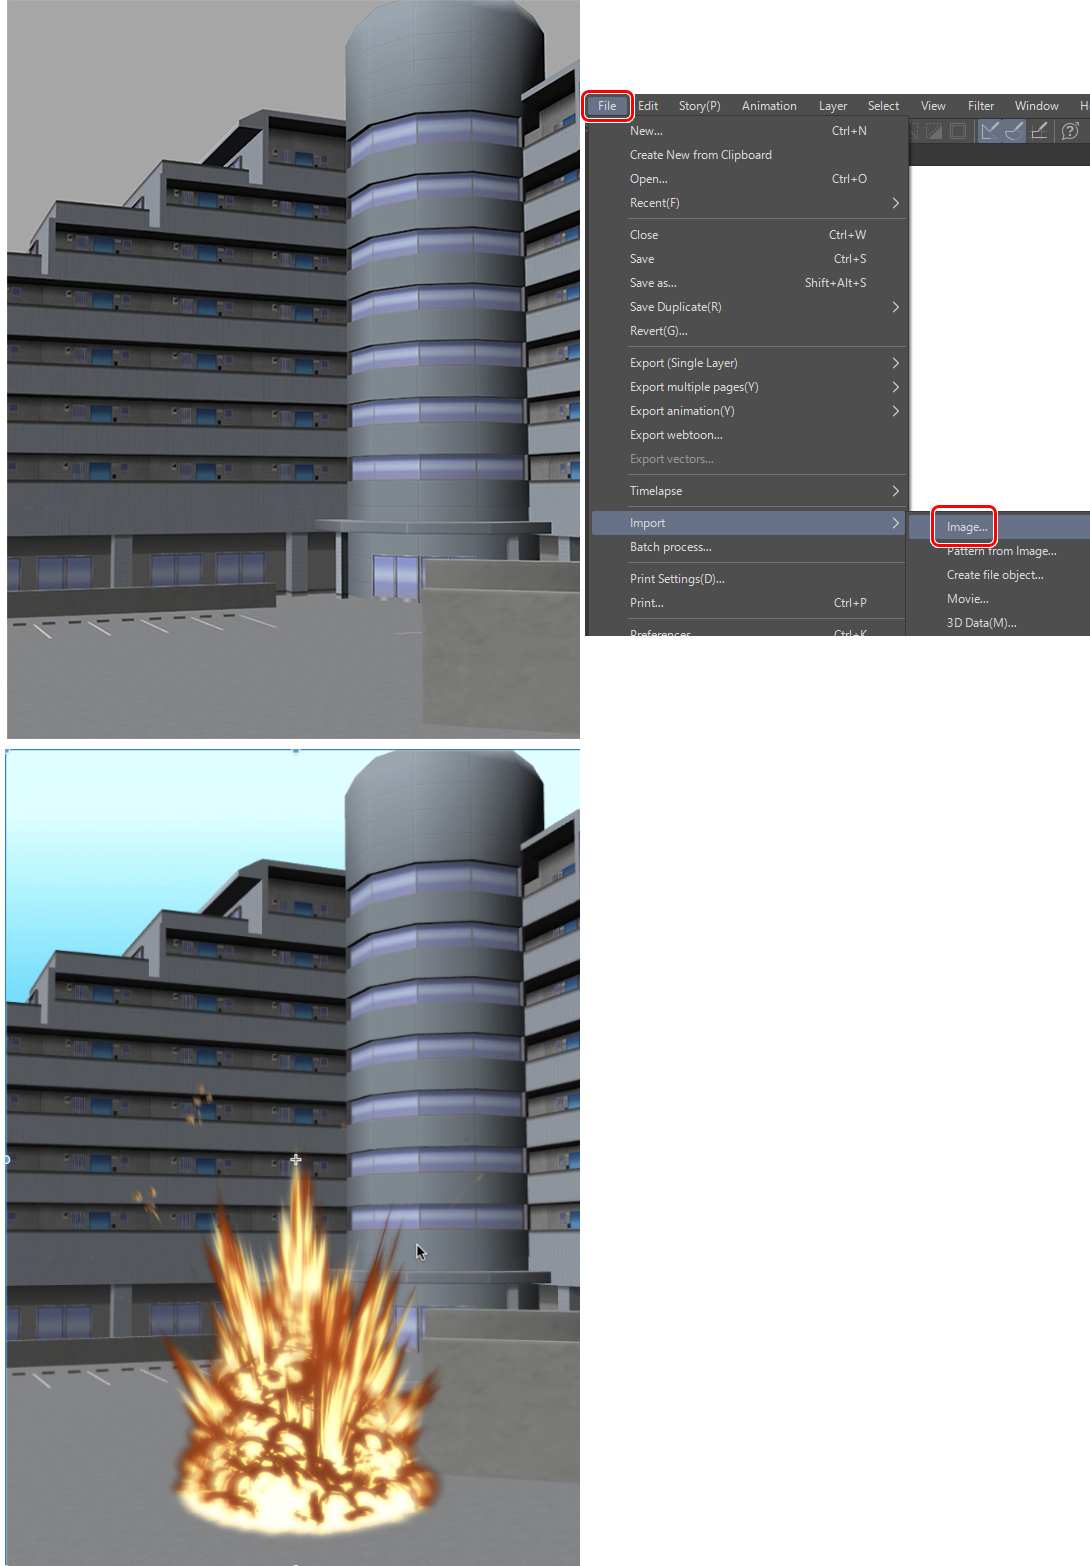
Once the prototype is imported, place it wherever yous like. Now allow the states integrate it better into the environment.
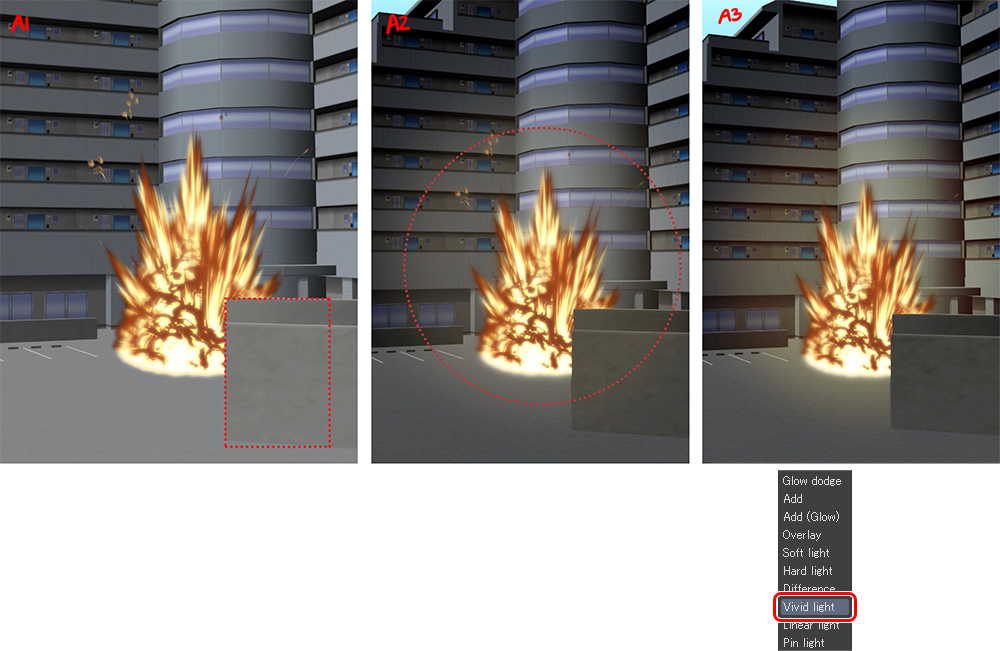
In this case, I placed it inside the parking lot. I erased the function of the explosion that is hidden behind the front wall (A1). In a new layer, I added some glow with the Soft airbrush tool (A2) to simulate the light of the fire. After that, I inverse the layer blending fashion to Vivid Light (A3).
This is the issue. I added some elements to the analogy, similar this car, to make it more than realistic.
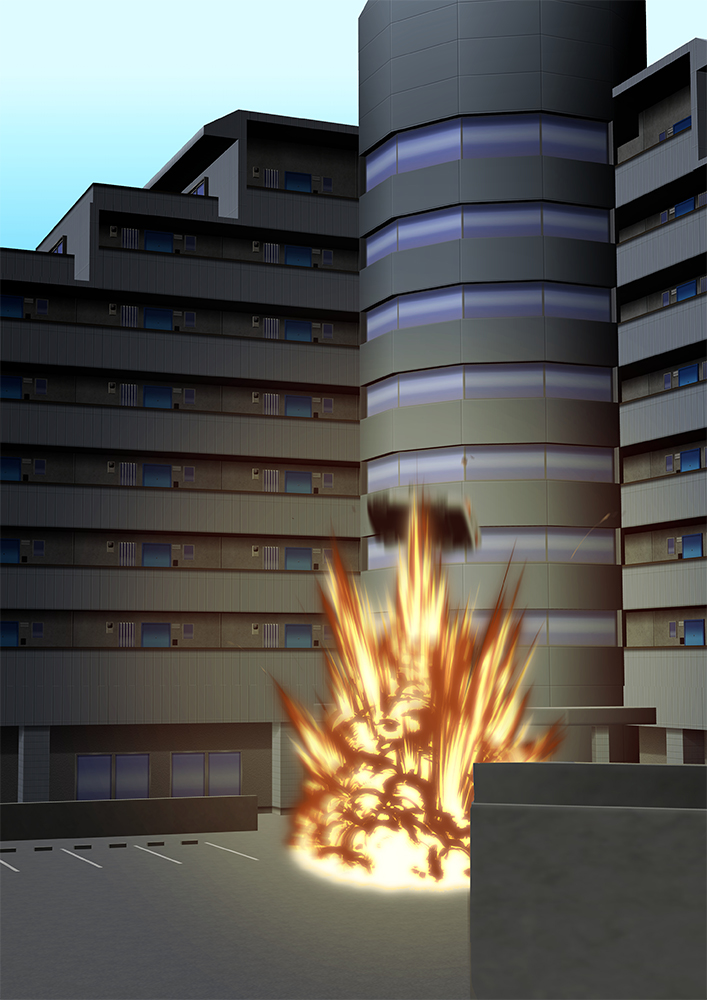
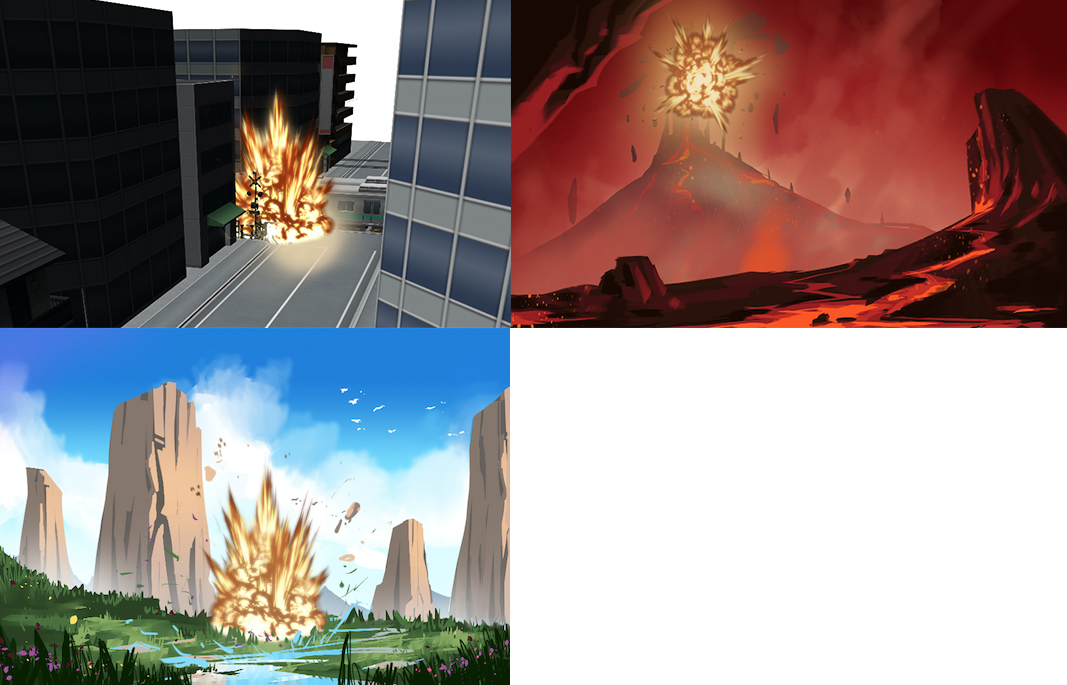
This is but one of the many means to integrate our explosions into an illustration, only there are many more. Allow me show y'all another examples for inspiration.
I hope that my tips and video will assistance you and you tin can shortly create dynamic illustrations with big explosions.
This is the finish of the tutorial. Please exercise share on Instagram (@Danipuente_conceptart) the best explosions you have made following this tutorial. I would beloved to see them!
If you accept any questions, I am at your disposal: danielpuentemorales@gmail.com.
It has been a pleasure to draw for all of you lot!
– Daniel Puente
world wide web.Danipuente.com
Instagram.com/danipuente_conceptart/
Artstation.com/danipuente
Source: https://www.clipstudio.net/how-to-draw/archives/165059
0 Response to "Clip Studio Paint How to Draw Fire"
Post a Comment